
Creative Recipes & Amazing Art | A Mixture Of Good Ingredients.
Incredible Recipes & Preparations For St. Patrick’s Day. What An Amazing Time!

Original Oil Painting Created By Mr. Ron Kennedy
______________________________________________________________

St. PATRICK’S DAY AMAZING SALAD BITES, SNACKS, DINNERS, DESSERTS & GREAT SUNDAY DISHES.
Regardless if it’s St. Patrick’s day or the day of ‘love & romance,’ great snacks and amazing dishes are in order. My wife was a gourmet chef, and knew how to make & prepare any dish ‘under the sun.’
We both were big sports fans. So when she died several years ago, but left me all the ways she prepared meals, along with all ingredients.
(I guess you could say she gave me all her secrets, and would love for me to share this with others!)
She was the creative one in the kitchen, I was the creative one with painting & drawing. Creative recipes and amazing art display a mixture of good ingredients. They both seem to compliment one another.
The use of ingredients regarding both skills, can create amazing finished products. (If you’re skillful in the kitchen, you can be skillful creating art).
There are helpful ingredients using either concept. (It just boils down to where your interest lies.) Both are a winning combination’s which will satisfy all parties. The content in this website will cover both!
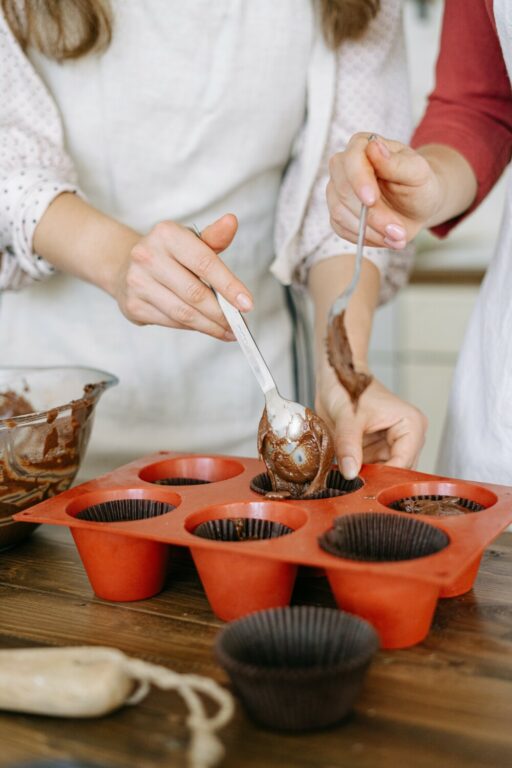
A St. Patrick’s Day Treat: Decorative Homemade Cup Cakes

Ingredients:
For the donuts:
- 2 cups all-purpose flour
- 1/2 cup granulated sugar
- 2 teaspoons baking powder
- 1/2 teaspoon salt
- 3/4 cup milk
- 2 large eggs
- 2 tablespoons unsalted butter, melted
- 1 teaspoon vanilla extract
- Oil for frying (vegetable or canola oil works well)
For the glaze:
- 1 cup powdered sugar
- 2-3 tablespoons milk or water
- 1/2 teaspoon vanilla extract
- Food coloring (pink or red)
Optional toppings:
- Sprinkles
- Chocolate shavings
- Crushed nuts
- Edible glitter
Instructions:
- Prepare the Dough: In a large mixing bowl, whisk together the flour, sugar, baking powder, and salt until well combined.
- Combine Wet Ingredients: In a separate bowl, whisk together the milk, eggs, melted butter, and vanilla extract until smooth.
- Mix Ingredients: Pour the wet ingredients into the dry ingredients and stir until just combined. Be careful not to over-mix; the batter should be slightly lumpy.
- Shape the Donuts: On a lightly floured surface, roll out the dough to about 1/2 inch thickness. Use a donut cutter or two differently sized round cookie cutters to cut out donut shapes. You can also use a small round cutter to create the hole in the center.
- Fry the Donuts: In a large, deep skillet or Dutch oven, heat the oil to 350°F (175°C). Carefully add the donuts to the hot oil, a few at a time, making sure not to overcrowd the pan. Fry for about 1-2 minutes on each side, or until golden brown. Use a slotted spoon to transfer the donuts to a wire rack lined with paper towels to drain excess oil.
- Make the Glaze: In a small bowl, whisk together the powdered sugar, milk or water, and vanilla extract until smooth. Add a few drops of food coloring to achieve your desired shade of pink or red.
- Glaze the Donuts: Dip each cooled donuts into the glaze, allowing any excess to drip off. Place the glazed donuts back onto the wire rack and immediately add any desired toppings, such as sprinkles or chocolate shavings, before the glaze sets.
- Serve and Enjoy: Serve the homemade Valentine’s Day donuts fresh and enjoy the love-filled treats with your special someone or share them with friends and family.
These homemade Valentine’s Day donuts are sure to be a hit with their soft, fluffy texture and sweet glaze, making them the perfect treat for celebrating love and affection.
Greek Guacamole
Serves 6/ Total Time: 10 Min.

Ingredients:
For the Guacamole:
- 3 ripe avocados, peeled, pitted, and mashed
- 1 small cucumber, finely diced
- 1/2 cup cherry tomatoes, quartered
- 1/4 cup red onion, finely chopped
- 1/4 cup Kalamata olives, pitted and chopped
- 1/4 cup crumbled feta cheese
- 2 cloves garlic, minced
- 2 tablespoons fresh lemon juice
- 2 tablespoons fresh mint leaves, chopped
- 2 tablespoons fresh dill, chopped
- Salt and black pepper to taste

For Serving Preparation:
Step 1: Prep the Avocado:
- Cut the avocados in half, remove the pits, and scoop out the flesh into a mixing bowl.
- Mash the avocados with a fork or potato masher until you achieve your desired level of creaminess. Some people prefer it slightly chunky, while others like it smooth.
Step 2: Add the Ingredients:
- Add the finely diced cucumber, quartered cherry tomatoes, finely chopped red onion, chopped Kalamata olives, crumbled feta cheese, minced garlic, fresh lemon juice, chopped mint leaves, and chopped dill to the mashed avocados.
Step 3: Season and Mix:
- Season the mixture with salt and black pepper to taste. Remember that feta cheese and olives can be salty, so adjust the seasoning accordingly.
- Gently fold all the ingredients together until well combined. Be careful not to over mix to maintain some texture in the guacamole.
Step 4: Chill:
- Cover the bowl with plastic wrap or a lid and refrigerate the Greek Guacamole for at least 30 minutes to allow the flavors to meld and develop.
Step 5: Serve:
- Just before serving, give the guacamole a quick stir. Serve it with pita chips, tortilla chips, or fresh vegetable sticks for dipping.
Enjoy your Greek Guacamole, a unique and delicious twist on the classic guacamole with Mediterranean flavors!
Feel free to adjust the quantities and seasonings to suit your taste preferences. Enjoy your Greek Guacamole!
Nutrition Facts (Approximate) for 1 serving (1/6th of the recipe):
- Calories: 160-200 calories
- Total Fat: 14-16 grams
- Saturated Fat: 3-4 grams
- Cholesterol: 5-10 milligrams
- Sodium: 250-300 milligrams
- Total Carbohydrates: 9-12 grams
- Dietary Fiber: 4-5 grams
- Sugars: 2-3 grams
- Protein: 3-4 grams
- Vitamin C: 10-15% of the Daily Value (DV)
- Calcium: 6-8% DV
- Iron: 4-6% DV
- Potassium: 300-350 milligrams
Please note that the nutritional values can vary based on the specific brands of ingredients and portion sizes. It’s also important to consider the type and quantity of chips or vegetables you serve with the guacamole, as they will add to the overall nutritional content of your snack or appetizer.
Chicken Salad Stuffed Avocados
Serves 4/ Total Time: 20 Min.

Ingredients:
For the Chicken Salad:
- 2 cups cooked chicken breast, shredded or diced
- 1/2 cup celery, finely chopped
- 1/4 cup red onion, finely chopped
- 1/4 cup mayonnaise
- 2 tablespoons Greek yogurt (or sour cream)
- 1 tablespoon Dijon mustard
- 1 tablespoon lemon juice
- 1 teaspoon fresh dill, finely chopped (or 1/2 teaspoon dried dill)
- Salt and pepper to taste
For Assembling:
- 3 ripe avocados, halved and pitted
- Lemon wedges (for garnish, optional)
- Fresh parsley or dill for garnish (optional)
Preparation Instructions:
- Prepare the Chicken Salad:
- In a mixing bowl, combine the cooked chicken, finely chopped celery, red onion, mayonnaise, Greek yogurt (or sour cream), Dijon mustard, lemon juice, and fresh dill.
- Season the mixture with salt and pepper to taste.
- Stir all the ingredients until well combined. Adjust the seasonings to your preference.
- Prepare the Avocado Halves:
- Cut the avocados in half and remove the pits. You can scoop out a bit of the flesh from the center to create a hollow space for the chicken salad.
- Squeeze a little lemon juice over the avocado halves to prevent them from browning.
- Fill the Avocado Halves:
- Scoop a generous portion of the prepared chicken salad into each avocado half, filling the hollowed center.
- You can mound it up slightly for an attractive presentation.
- Garnish:
- If desired, garnish the stuffed avocados with fresh parsley, dill, or a lemon wedge for added flavor and presentation.
- Serve:
- Serve your Chicken Salad Stuffed Avocados immediately, and enjoy! They make a delicious and satisfying meal or appetizer.
- Open a world of Flavor with a monthly spice subscription from RawSpiceBar.com. Build your subscription to suit your recipe preference and duration that meets your needs.
Feel free to adjust the ingredients and seasonings to suit your taste. This dish is not only tasty but also provides a healthy and creamy contrast with the avocado and the flavorful chicken salad.
The nutrition facts for Chicken Salad Stuffed Avocados can vary depending on the specific ingredients and portion sizes used.
I’ll provide a rough estimate based on a typical recipe, but it’s essential to remember that the actual nutritional content can vary based on factors like the size of the avocados and the exact measurements of the ingredients you use. Here’s an approximate breakdown per stuffed avocado half (assuming 6 servings):
Nutrition Facts (Per Stuffed Avocado Half):
- Calories: Approximately 250-300 calories
- Protein: Approximately 15-20 grams
- Carbohydrates: Approximately 5-10 grams
- Dietary Fiber: Approximately 4-6 grams
- Sugars: Approximately 1-2 grams
- Fat: Approximately 20-25 grams
- Saturated Fat: Approximately 2-4 grams
- Cholesterol: Approximately 40-50 mg
- Sodium: Approximately 250-350 mg
The actual values may vary based on the specific ingredients and brands you use, so if you have specific dietary concerns or need more precise nutrition information, it’s a good idea to calculate the nutritional content using a nutritional calculator or consult the packaging labels of the individual ingredients. Additionally, you can make adjustments to the recipe to suit your dietary preferences, such as using low-fat mayonnaise or yogurt for a lighter option.
Mozzarella Sticks With Herb-Yogurt
Serves 8/ Total Time: 1 Hr 15 Min

Ingredients:
1 eg, 1 tbsp, water, Kosher salt, 1/4 teaspoon freshly ground black pepper, 1/2 cup almond flour, 1/2 c.grated Parmesan, 6 (1-oz), sticks mozzarella string cheese, 1/2 cup Greek yogurt, 1 tbsp. White vinegar, 1/2 tbsp. Garlic powder, 2 tbsp. Freshly chopped dill, 1 tbsp. Finely chopped chives, 2 tbsp. Extra-virgin olive oil.
Preparation For Herb-Yogurt Dip:
- 1 cup Greek yogurt
- 2 tablespoons fresh herbs (e.g., parsley, dill, chives), finely chopped
- 1 clove garlic, minced
- 1 tablespoon lemon juice
- Salt and pepper to taste
Step 1: Prepare the Dip
- In a small bowl, combine the Greek yogurt, minced garlic, lemon juice, and the finely chopped fresh herbs.
- Season the dip with salt and pepper to taste.
- Mix everything together, cover, and refrigerate the dip while you prepare the mozzarella sticks.
Step 2: Prepare Breading Stations
- Set up three shallow dishes or bowls. The first one, place the all-purpose flour. The second, beat the eggs until well combined. In the third, combine the breadcrumbs with Italian seasoning, garlic powder, paprika, and a pinch of salt and pepper.
Step 3: Coat the Mozzarella Sticks
- Take a mozzarella stick and dip it into the flour, ensuring it’s coated evenly.
- Then, dip it into the beaten eggs, allowing any excess to drip off.
- Finally, coat the stick with the breadcrumb mixture, pressing gently to adhere the breadcrumbs.
- Place the coated mozzarella sticks on a baking sheet and repeat with all sticks.
Step 4: Freeze the Mozzarella Sticks
- Place the baking sheet with the coated mozzarella sticks in the freezer for about 30 minutes. This will help the breading adhere better and prevent the cheese from oozing out during frying.
Step 5: Fry the Mozzarella Sticks
- In a deep, heavy-bottomed pot, heat about 2 inches of cooking oil to 350°F (175°C).
- Carefully fry the mozzarella sticks in batches, ensuring not to overcrowd the pot. Fry until they turn golden brown and crispy, usually for 2-3 minutes.
- Use a slotted spoon to remove them from the oil and place them on a plate lined with paper towels to remove excess oil.
- Serve the mozzarella sticks hot with the prepared herb-yogurt dip.
Enjoy your homemade Mozzarella Sticks with Herb-Yogurt Dip, serving 8 people as a delicious appetizer or snack!
Taste the world with recipes from Raw Spice Bar
Nutrition Facts:
Mozzarella Sticks (per serving, assuming 2 sticks):
- Calories: Approximately 200-250 k cal
- Total Fat: About 12-15 grams
- Saturated Fat: About 5-7 grams
- Carbohydrates: Around 15-20 grams
- Protein: Approximately 8-10 grams
- Fiber: 1-2 grams
- Sodium: About 400-500 mg
Herb-Yogurt Dip (per serving, assuming 2 tablespoons):
- Calories: Approximately 30-40 k cal
- Total Fat: About 1-2 grams
- Saturated Fat: About 0-1 gram
- Carbohydrates: Around 3-5 grams
- Protein: Approximately 2-3 grams
- Fiber: 0 grams
- Sodium: About 30-50 mg
Please note that these values can vary based on factors such as the brand of ingredients, portion sizes, and any modifications made to the recipe. Additionally, frying the mozzarella sticks will significantly impact the calorie and fat content. If you are concerned about specific dietary needs, it’s a good idea to use a nutrition calculator or consult the nutrition labels on the product packaging to get a more accurate assessment.
Shrimp Salad
Serves 4/ Total Time: 10 Min.

Ingredients:
For the Salad:
- 1 pound (450g) large cooked shrimp, peeled and divide
- 4 cups mixed salad greens (lettuce, spinach, arugula, etc.)
- 1 cup cherry tomatoes, halved
- 1/2 cucumber, sliced
- 1/4 red onion, thinly sliced
- 1/4 cup sliced black olives (optional)
- 1/4 cup crumbled feta cheese (optional)
- 2 hard-boiled eggs, sliced (optional)
For the Dressing:
- 3 tablespoons olive oil
- 2 tablespoons lemon juice
- 1 clove garlic, minced
- 1 teaspoon Dijon mustard
- Salt and pepper to taste
Optional Additions:
Feel free to customize your shrimp salad with additional ingredients such as avocado, bell peppers, croutons, or your favorite salad vegetables. You can also adjust the dressing to your taste, adding herbs or spices for extra flavor.
This basic shrimp salad is a great starting point, and you can adapt it to your preferences or dietary requirements. Enjoy your delicious shrimp salad!
Basic Shrimp Salad Nutrition Facts (per serving, assuming 6 servings):
- Calories: Approximately 200-250 calories
- Protein: Approximately 20-25 grams
- Carbohydrates: Approximately 8-10 grams
- Dietary Fiber: Approximately 2-3 grams
- Sugars: Approximately 2-3 grams
- Fat: Approximately 10-12 grams
- Saturated Fat: Approximately 2-3 grams
- Cholesterol: Approximately 200-250 mg
- Sodium: Approximately 400-500 mg
- Potassium: Approximately 400-500 mg
- Vitamin A: Varies based on salad greens and vegetables
- Vitamin C: Varies based on salad greens and vegetables
- Calcium: Varies based on salad ingredients
- Iron: Varies based on salad ingredients
These values are approximate and can change significantly based on the specific ingredients, portion sizes, and any additional items you choose to include in your shrimp salad. If you have specific dietary concerns or need more precise nutrition information, you can use a nutritional calculator or consult the packaging labels of individual ingredients.
Caprese Zoodles
Serves 6/ Total Time: 25 Min.

Ingredients:
For the Caprese Zoodles:
- 4 medium zucchinis, spiralized into zoodles
- 1 cup cherry tomatoes, halved
- 1 cup fresh mozzarella pearls (small mozzarella balls)
- 1/2 cup fresh basil leaves, torn or chopped
- Salt and black pepper to taste
For the Balsamic Vinaigrette:
- 3 tablespoons extra-virgin olive oil
- 2 tablespoons balsamic vinegar
- 1 clove garlic, minced
- 1/2 teaspoon Dijon mustard (optional)
- Salt and black pepper to taste
Instructions:
- Prepare the Balsamic Vinaigrette:
- In a small bowl, whisk together the extra-virgin olive oil, balsamic vinegar, minced garlic, and Dijon mustard (if using).
- Season the vinaigrette with salt and black pepper to taste. Set it aside.
- Prepare the Zoodles:
- Use a spiralizer to create zucchini noodles (zoodles). If you don't have a spiralizer, you can use a julienne peeler or buy pre-spiralized zucchini.
- Assemble the Caprese Zoodles:
- In a large mixing bowl, combine the zucchini noodles, halved cherry tomatoes, fresh mozzarella pearls, and torn or chopped basil leaves.
- Season the mixture with salt and black pepper to taste.
- Add the Dressing:
- Drizzle the prepared balsamic vinaigrette over the zucchini noodle mixture.
- Toss and Serve:
- Gently toss the ingredients to combine and coat them with the vinaigrette.
- Serve the Caprese Zoodles immediately as a light and refreshing salad.
Nutrition Facts (Approximate, per serving):
- Calories: 200-250 calories
- Protein: 8-10 grams
- Carbohydrates: 10-12 grams
- Dietary Fiber: 2-4 grams
- Sugars: 5-6 grams
- Fat: 14-16 grams
- Saturated Fat: 5-6 grams
- Cholesterol: 20-25 mg
- Sodium: 250-300 mg
The actual nutritional content may vary based on the specific ingredients used and portion sizes. This is a rough estimate, so if you have specific dietary concerns or need precise nutrition information, it's advisable to calculate the nutritional content based on the specific products you use.
Grilled Eggplant
Serves 6/Total Time: 45 Min.

Ingredients:
- 2 medium-sized eggplants
- 2-3 tablespoons olive oil
- Salt and pepper, to taste
- Optional seasonings: garlic powder, paprika, dried herbs (e.g., oregano, thyme)
Instructions:
- Prepare the Eggplants:
- Wash and trim the ends of the eggplants.
- You can peel the eggplants if you prefer, but it's not necessary.
- Slice the eggplants into rounds or lengthwise into planks, depending on your preference and how you plan to use them.
- Preheat the Grill:
- Preheat your grill to medium-high heat. You can also use a grill pan on the stove top.
- Brush with Olive Oil:
- Brush both sides of the eggplant slices with olive oil to prevent sticking and enhance flavor.
- Season the eggplant slices with salt, pepper, and any optional seasonings you like.
- Grill the Eggplants:
- Place the eggplant slices on the grill and cook for about 3-4 minutes per side, or until they have grill marks and are tender.
- Cooking time may vary depending on the thickness of the slices and the heat of your grill.
- Serve:
- Once the eggplant slices are grilled to your desired level of tenderness and have grill marks, remove them from the grill.
- Serve the grilled eggplants as a side dish, drizzle with additional olive oil, and garnish with herbs if desired.
Nutritional Facts (Approximate, per 1 cup of grilled eggplant slices):
- Calories: Approximately 30-40 calories
- Protein: 1-2 grams
- Carbohydrates: 6-8 grams
- Dietary Fiber: 3-4 grams
- Sugars: 3-4 grams
- Fat: 1-2 grams
- Sodium: 0-10 mg
- Potassium: 200-250 mg
The actual nutritional content may vary based on the size and thickness of your eggplant slices, as well as the amount of olive oil and seasonings used. Grilled eggplants are a low-calorie and nutritious side dish that's rich in fiber, making them a healthy addition to your meals.
Gift a Year Subscription and Get a $36 Gift Card for You!
Rosemary Dijon Salmon
Serves 4/ Total Time: 30 Min.
Ingredients:
For the Rosemary Dijon Marinade:
- 4 salmon fillets (about 6 ounces each)
- 2 tablespoons Dijon mustard
- 2 tablespoons olive oil
- 2 cloves garlic, minced
- 1 tablespoon fresh rosemary, finely chopped (or 1 teaspoon dried rosemary)
- 1 tablespoon lemon juice
- Salt and black pepper to taste
Instructions:
- Prepare the Marinade:
- In a small bowl, whisk together the Dijon mustard, olive oil, minced garlic, chopped rosemary, lemon juice, salt, and black pepper.
- Marinate the Salmon:
- Place the salmon fillets in a dish or a zip-top bag, and pour the marinade over them. Ensure the salmon is evenly coated.
- Seal the bag (if using) or cover the dish with plastic wrap. Refrigerate and marinate for at least 30 minutes, but longer marinating times (up to a few hours) can enhance the flavor.
- Preheat the Oven:
- Preheat your oven to 375°F (190°C).
- Bake the Salmon:
- Place the marinated salmon fillets on a baking sheet lined with parchment paper or lightly greased.
- Bake in the preheated oven for about 12-15 minutes or until the salmon is cooked through and flakes easily with a fork. The exact cooking time may vary depending on the thickness of the fillets.
- Serve:
- Once the salmon is cooked, remove it from the oven.
- Garnish with additional fresh rosemary or lemon slices if desired.
- Serve the Rosemary Dijon Salmon hot with your choice of side dishes, such as steamed vegetables, rice, or a fresh salad.
Nutrition Facts (Approximate, per serving, without side dishes):
- Calories: Approximately 300-350 calories
- Protein: 35-40 grams
- Carbohydrates: 2-3 grams
- Dietary Fiber: 0 grams
- Sugars: 0 grams
- Fat: 18-20 grams
- Saturated Fat: 3-4 grams
- Cholesterol: 90-100 mg
- Sodium: 250-300 mg
The actual nutritional content may vary based on the specific salmon fillets and ingredients you use. If you have specific dietary concerns or need more precise nutrition information, it's advisable to calculate the nutritional content based on the exact products you use.
Baked Cod With Roasted Potatoes & Green Beans
Serves 6/ Total Time: 10 Min.

Ingredients:
For the Baked Cod:
- 4 cod fillets (about 6-8 ounces each)
- 2 tablespoons olive oil
- 2 cloves garlic, minced
- 1 lemon, thinly sliced
- 1 tablespoon fresh parsley, chopped
- Salt and black pepper to taste
- Lemon wedges for serving (optional)
For the Green Beans and Potatoes:
- 1 pound green beans, trimmed
- 1 pound potatoes, thinly sliced (you can use Yukon Gold or similar)
- 2 tablespoons olive oil
- 1 teaspoon dried thyme
- Salt and black pepper to taste
Instructions:
- Preheat the Oven:
- Preheat your oven to 375°F (190°C).
- Prepare the Green Beans and Potatoes:
- In a large mixing bowl, combine the trimmed green beans and thinly sliced potatoes.
- Drizzle olive oil over the vegetables, add dried thyme, salt, and black pepper. Toss to coat the vegetables evenly.
- Prepare the Baked Cod:
- Place the cod fillets on a separate baking sheet lined with parchment paper.
- Drizzle olive oil over the cod fillets and season with minced garlic, salt, and black pepper.
- Place lemon slices on top of the cod fillets, and sprinkle with fresh parsley.
- Bake:
- Place both the baking sheet with the cod and the one with the green beans and potatoes in the preheated oven.
- Baking Times:
- Bake the cod for approximately 15-20 minutes, or until the fish is cooked through and flakes easily.
- Bake the green beans and potatoes for about 20-25 minutes, or until they are tender and lightly browned.
- Serve:
- Serve the baked cod fillets on top of a bed of the green beans and potatoes. Optionally, garnish with lemon wedges and additional fresh parsley.
Nutrition Facts (Approximate, per serving):
- Calories: 350-400 calories
- Protein: 30-35 grams
- Carbohydrates: 30-35 grams
- Dietary Fiber: 5-7 grams
- Sugars: 3-4 grams
- Fat: 10-12 grams
- Saturated Fat: 1-2 grams
- Cholesterol: 50-60 mg
- Sodium: 250-300 mg
The actual nutritional content may vary based on the specific ingredients and portion sizes used. If you have specific dietary concerns or need precise nutrition information, it's advisable to calculate the nutritional content based on the specific products you use. Enjoy your Baked Cod with Green Beans and Potato Slices!
Slow-cooker Beef Stroganoff
Serves 4/ Total Time: 4 Hr 30 min.

Ingredients:
- 2 pounds beef stew meat or sirloin steak, cut into cubes
- 1 onion, finely chopped
- 2 cups sliced mushrooms
- 3 cloves garlic, minced
- 1 1/2 cups beef broth
- 2 tablespoons Worcestershire sauce
- 2 tablespoons Dijon mustard
- 1 teaspoon dried thyme
- 1 teaspoon paprika
- Salt and black pepper to taste
- 2 cups sour cream
- 1/4 cup all-purpose flour
- 1/4 cup water
- Cooked egg noodles, rice, or mashed potatoes for serving
- Fresh parsley, chopped, for garnish (optional)
Instructions:
- Brown the Beef: In a large skillet, heat a bit of oil over medium-high heat. Add the beef cubes and cook until browned on all sides. This step is optional but adds extra flavor. Transfer the browned beef to the slow cooker.
- Combine Ingredients: In the slow cooker, add the chopped onion, sliced mushrooms, minced garlic, beef broth, Worcestershire sauce, Dijon mustard, dried thyme, paprika, salt, and black pepper. Stir to combine.
- Cook in the Slow Cooker: Cover the slow cooker and cook on the low setting for about 7-8 hours or until the beef is tender. Alternatively, you can cook on high for 3-4 hours.
- Create a Slurry: In a small bowl, mix the flour and water to create a slurry. Stir until smooth.
- Thicken the Sauce: About 30 minutes before serving, stir the slurry into the slow cooker to thicken the sauce. Cover and let it continue to cook.
- Finish with Sour Cream: Just before serving, stir in the sour cream to make the sauce creamy. Adjust the seasoning with more salt and pepper if needed.
- Serve: Serve the Beef Stroganoff over cooked egg noodles, rice, or mashed potatoes. Garnish with chopped fresh parsley if desired.
Nutrition Facts (Approximate, per serving, not including the side dish):
- Calories: 350-450 calories
- Protein: 30-40 grams
- Carbohydrates: 10-15 grams
- Dietary Fiber: 1-2 grams
- Sugars: 2-3 grams
- Fat: 20-25 grams
- Saturated Fat: 8-10 grams
- Cholesterol: 100-120 mg
- Sodium: 400-600 mg
These values are approximate and can vary based on the specific ingredients and portion sizes used. If you have specific dietary concerns or need more precise nutrition information, it's advisable to calculate the nutritional content based on the specific products you use. Slow Cooker Beef Stroganoff is a hearty and satisfying dish, perfect for a comforting dinner. Enjoy!
Greek Stuffed Chicken
Serves 4/ Total Time: 45 Min.

Ingredients:
For the Stuffed Chicken:
- 4 boneless, skinless chicken breasts
- 1 cup spinach, chopped
- 1/2 cup sun-dried tomatoes, chopped
- 1/2 cup crumbled feta cheese
- 1/4 cup Kalamata olives, pitted and chopped
- 1/4 cup red onion, finely chopped
- 2 cloves garlic, minced
- 1 teaspoon dried oregano
- Salt and black pepper to taste
- Olive oils for cooking
For the Greek Tzatziki Sauce (optional):
- 1 cup Greek yogurt
- 1/2 cucumber, finely grated and drained
- 1 clove garlic, minced
- 1 tablespoon fresh lemon juice
- 1 tablespoon fresh dill, chopped
- Salt and black pepper to taste
Instructions:
Prepare the Stuffed Chicken:
- Preheat your oven to 375°F (190°C).
- In a bowl, combine the chopped spinach, sun-dried tomatoes, crumbled feta cheese, chopped Kalamata olives, finely chopped red onion, minced garlic, dried oregano, salt, and black pepper. This mixture will be the filling for the chicken.
- Carefully cut a pocket into each chicken breast, being careful not to cut all the way through. Stuff each chicken breast with the Mediterranean filling.
- Heat some olive oil in an ovenproof skillet over medium-high heat. Sear the stuffed chicken breasts on both sides until they are golden brown.
- Transfer the skillet to the preheated oven and bake for about 20-25 minutes or until the chicken is cooked through (internal temperature of 165°F or 74°C).
Prepare the Greek Tzatziki Sauce (optional):
- In a bowl, combine the Greek yogurt, finely grated and drained cucumber, minced garlic, fresh lemon juice, chopped dill, salt, and black pepper. Mix well.
- Refrigerate the tzatziki sauce while the chicken is cooking.
Serve:
- Once the chicken is done, serve it with a dollop of the Greek Tzatziki Sauce (if using).
- You can also garnish with extra chopped fresh herbs or lemon wedges, if desired.
Nutrition Facts (Approximate, per serving, excluding optional sauce and garnishes):
- Calories: 350-400 calories
- Protein: 30-35 grams
- Carbohydrates: 10-15 grams
- Dietary Fiber: 2-4 grams
- Sugars: 4-6 grams
- Fat: 18-20 grams
- Saturated Fat: 6-8 grams
- Cholesterol: 80-100 mg
- Sodium: 600-700 mg
These values are approximate and can vary based on the specific ingredients and portion sizes used. If you have specific dietary concerns or need more precise nutrition information, it's advisable to calculate the nutritional content based on the specific products you use.
Greek Stuffed Chicken is a flavorful and satisfying dish that provides protein and a variety of Mediterranean-inspired flavors. Enjoy!
Spinach & Artichoke Stuffed Pork Chops
Serves 4/Total Time: 35 Min.

Ingredients:
For the Stuffed Pork Chops:
- 4 boneless pork chops, thick-cut
- 1 cup fresh spinach, chopped
- 1 cup canned artichoke hearts, chopped
- 1 cup cream cheese
- 1/2 cup grated Parmesan cheese
- 2 cloves garlic, minced
- 1/2 teaspoon dried oregano
- Salt and black pepper to taste
- Olive oils for searing
For the Seasoning:
- 1 teaspoon paprika
- 1 teaspoon dried thyme
- Salt and black pepper to taste
Instructions:
- Prepare the Pork Chops:
- Preheat your oven to 375°F (190°C).
- Use a sharp knife to create a pocket in each pork chop. Be careful not to cut all the way through the chop. Season the pork chops with paprika, dried thyme, salt, and black pepper, both inside the pocket and on the outside.
- Prepare the Spinach and Artichoke Stuffing:
- In a mixing bowl, combine the chopped fresh spinach, chopped artichoke hearts, cream cheese, grated Parmesan cheese, minced garlic, dried oregano, salt, and black pepper. Mix until well combined.
- Stuff the Pork Chops:
- Carefully stuff each pork chop pocket with the spinach and artichoke mixture, dividing it evenly among the chops.
- Sear the Pork Chops:
- Heat some olive oil in an oven-safe skillet over medium-high heat.
- Sear the stuffed pork chops for about 2-3 minutes on each side, until they are golden brown.
- Bake the Pork Chops:
- Transfer the skillet to the preheated oven and bake for approximately 15-20 minutes or until the pork reaches an internal temperature of 145-160°F (63-71°C).
- Serve:
- Serve the Spinach and Artichoke Stuffed Pork Chops hot, garnished with extra grated Parmesan cheese and fresh herbs if desired.
Nutrition Facts (Approximate, per serving):
- Calories: 400-450 calories
- Protein: 35-40 grams
- Carbohydrates: 5-10 grams
- Dietary Fiber: 2-4 grams
- Sugars: 2-4 grams
- Fat: 25-30 grams
- Saturated Fat: 10-12 grams
- Cholesterol: 100-120 mg
- Sodium: 500-600 mg
These values are approximate and can vary based on the specific ingredients and portion sizes used. If you have specific dietary concerns or need more precise nutrition information, it's advisable to calculate the nutritional content based on the specific products you use.
Spinach and Artichoke Stuffed Pork Chops are a delicious and protein-rich dish that's perfect for a special dinner. Enjoy!
Egg Roll Bowls
Serves4/Total Times: 35 Min

Ingredients:
For the Egg Roll Bowls:
- 1 pound ground pork (you can also use ground chicken or turkey)
- 1 small onion, finely chopped
- 3 cloves garlic, minced
- 1 teaspoon ginger, minced
- 1/4 cup low-sodium soy sauce or Tamara (for a gluten-free option)
- 1 tablespoon sesame oil
- 1/2 teaspoon red pepper flakes (adjust to your spice preference)
- 1 small head of green cabbage, shredded
- 2 large carrots, julienne or thinly sliced
- 4 green onions, sliced
- Salt and black pepper to taste
- 2 tablespoons vegetable oil (for cooking)
- Sesame seeds and chopped cilantro for garnish (optional)
Instructions:
- Cook the Pork:
- In a large skillet or wok, heat the vegetable oil over medium-high heat. Add the ground pork and cook until it's browned and no longer pink, breaking it into small pieces as it cooks. Remove any excess fat.
- Add Aromatics:
- Add the chopped onion, minced garlic, and minced ginger to the cooked pork. Sauté for 2-3 minutes until the onion is translucent and fragrant.
- Season:
- Pour in the soy sauce, sesame oil, and red pepper flakes. Stir to combine. Season with salt and black pepper to taste.
- Add Vegetables:
- Add the shredded cabbage and julienne carrots to the skillet. Stir-fry for 5-7 minutes, or until the vegetables are tender but still slightly crisp.
- Finish:
- Stir in the sliced green onions and cook for another 1-2 minutes, allowing them to wilt slightly.
- Serve:
- Serve the Egg Roll Bowls hot, garnished with sesame seeds and chopped cilantro if desired. You can also drizzle extra soy sauce or hot sauce on top for added flavor.
These Egg Roll Bowls are a satisfying and flavorful dish that's quick to make and can be customized to suit your taste. Enjoy!
Cheesy Meatballs
Serves 6/Total Time: 50 min

Ingredients:
For the Meatballs:1 pound ground beef (you can also use a mix of ground beef and ground pork)1/2 cup breadcrumbs1/4 cup grated Parmesan cheese1/4 cup milk1/4 cup finely chopped onion2 cloves garlic, minced1 egg1 teaspoon dried oregano, Salt and black pepper to taste Mozzarella cheese cubes (about 1/2-inch cubes)
For the Tomato Sauce:2 cups tomato sauce or marinara sauce1/2 teaspoon dried basil1/2 teaspoon dried oregano Salt and black pepper to taste Instructions:
Preheat the Oven: Preheat your oven to 375°F (190°C).Prepare the Meat Mixture:In a large mixing bowl, combine the ground meat (beef and pork if using), breadcrumbs, grated Parmesan cheese, milk, finely chopped onion, minced garlic, egg, dried oregano, salt, and black pepper. Mix until well combined.
Form the Meatballs: Take a small amount of the meat mixture and flatten it in your palm. Place a cube of mozzarella cheese in the center, then form the meat around the cheese to create a meatball.
Repeat this process for all meatballs, ensuring that the cheese is completely enclosed by the meat. Prepare the Tomato Sauce: In a separate bowl, mix the tomato sauce, dried basil, dried oregano, salt, and black pepper. Assemble and Bake:
Place the meatballs in a baking dish or on a baking sheet lined with parchment paper. Pour the prepared tomato sauce over the meatballs. Bake: Bake the meatballs in the preheated oven for about 25-30 minutes, or until they are cooked through and the cheese inside is melted and gooey.
Serve: Serve the Cheesy Meatballs with additional grated Parmesan cheese and fresh herbs for garnish if desired.
Enjoy your delicious and cheesy meatballs! The melted mozzarella center adds a delightful surprise to this classic dish.
Gift a Year Subscription and Get a $36 Gift Card for You!
Great Food & Fine Art Goes Hand-in-Hand!
____________________________________________________________________________________

You've worked in the kitchen all day, preparing great tasty dinners & snacks. The family is 'happy!' Their stomachs are full and now ready for quality family time.
Now you're able to relax, kick back and do other things that interest you! One of those things would be trying your hand at creative art.
Creating and displaying great art, is the same as displaying and creating good food; it's the visuals & final product that counts!
Question? Where Can I Learn To Paint Like That? (The Thrill of Creative Art Will Excite You!)

No Special Skills Needed To Have Fun...
Online art lessons was needed growing up. (Sadly no internet back then.) But loved to draw! It didn’t matter what the subject was. Where can I learn to draw and paint was no longer an option.
Just establishing the fundamentals of good art, it was meant for me to learn and master. Friends would also give me encouragement. But even without it, I always held the drive and desire.
Later, it had gotten to a point that everyone wanted me to draw pics for them. No one ever thought about how time consuming a good drawing or painting can be (I guess they figured I had nothing else better to do).
Drawing along with oil painting was fun and creative, but a little messy, lol. I knew it would only be a matter of time when success would be mine.
Overtime, I knew learning brush on stretched canvas would be an accomplished task. With all the time now we spend at home, this is a fantastic way to try your hand with Free Online Art Lessons.
For me, hanging out at the art museum in Chicago was just as exciting as hanging out on the basketball court with the fellows. Viewing the works of the old masters of the 16th century such as Rembrandt, Renoir, Picasso, etc; always had me leaving the museum thinking, “How the hell they do that?!”
Looking at the work of the old 16th masters always gave me a thrill no one else could understand. A person would need an artist mind and eye to appreciate good art.
Realizing with the right tools, such as taking online courses, and investing a little time in myself, I’d be as good as any of the other amazing artist of current times and past. (Not like those old masters, but I’ll get as close as I can).
Sometime the technique of art and just learning the skills can feel like it’s something that’s beyond your creative reach. But when you really look at everything with a broad and creative mind, you know this is something you want to do.
Families are always in search of fun things to do together. Now you and the whole family can create your favorite things together. Spending quality, family time together is what it’s all about!
Lately, we all spend a lot of time at home. Now we must utilize that time and do something constructive. This is the perfect time to try something new, If you’ve never tried any art related projects before. Maybe you’re already somewhat of an artist at the beginner level, now you can explore your skills.
Ron’s gallery of original oils, charcoal drawings and acrylic paintings are on display here.

I love creative art. Painting and drawing (among other things) is something I enjoy very much. I utilized the techniques offered from the series of ‘Online Art Lessons’ just to show what can be done just by following what’s taught. You can do the same! It’s easy, simple & fun!

Manhattan Beach pier, oil on canvas, 26 x 30,

Surfs up at Manhattan Beach, 24 x36, Acrylic Painting,


English Bulldog, “Friendly And Goofy-Looking, But Lovable,” Acrylic Painting on Canvas, 18 x 24 x 1.0,

“A Beagle Pup On A Cloudy And Chilly Day.” Acrylic Painting on Canvas, 20 x 20 x 1.0


“Cabin in the woods” 12 x 16, oil painting $175

Oil Painting on Canvas, 20 x 16 x 1.0 (Not For Sale)


Acrylic on canvas, 20 x 20 x 1.5 $225

Acrylic on canvas 24 x 30 x 1.5 $400

Surprised Lady 16×20 acrylic
Lets get acquainted. Let me know what’s happening in your world of creativity: rjkennedy1000@gmail.com
![]()
My Transition From Canvas Paintings To Drawings In 3 Easy Lessons.

Putting My Creative Drawings Skills To Work
Although oil & acrylic painting, along with watercolor was my love later in life, I first started with pencil drawing sketches and learning how to utilize color with pencils. I admit I wasn’t that good with watercolors or charcoal, but now a little better. LOL.
Having a creative mind and studying cartooning skills, putting together a humor book was a long time idea that finally rose to the forefront. I love writing humor that folks can relate to.
Now don’t get me wrong! I haven’t given up on my oil painting and water coloring, I just want to show that you can be creative in other areas as well.
Putting together this new project was a task. Centering on a comical idea that could help prepare lonely singles on what to expect, as far as personalities are concerned, has never been done.
I thought it would be great if a person knew about an individual BEFORE they get totally involved with him or her. In other words, It’ll be like having your own personal and private ‘Crystal Ball.’ This crazy book is their crystal ball.
Presented in a ‘Show and Tell’ format, this guidebook offers the single individual an hilarious glimpse into the personality of the opposite sex. The wacky information from this book will somewhat enable a person to prepare their game plan in advance.
They would have insight on what to expect in terms of a person’s occupation, favorite foods, drinks, music, movies, tv shows, sports, hobbies, type of car, last book read, turn on/turn-offs, secret fantasy, astrological sign, personality, Ideal mate, where to meet, goal, & rating.
Now with all this information in the single person’s possession (for what it’s worth), and a well-thought-out plan of action, any man or woman can be theirs. Here’s a sample profile on one of the characters in this book.
Watch This Short Slide Video Of Some Funny Characters Still Searching For Love.
I put this character’s profile at the top of my comedy ‘hit’ list. I gave myself a good laugh while creating this one. Although, all my characters profile’s give me a good feeling, this one represents many whiners living in our society today.
The men out there who’s still attached to mom’s apron strings. The spoiled type looking for love, affection and pampering. (The same affection mom gave him when she helps tuck him in at night with his milk and cookies).
Ladies, when seeking a dating partner, here’s an example of what you could end up with:
‘Mama’s Boy’
VITAL STATISTICS – Age: 24 to 49, Height: 5’7″ to 6’4″, Weight: Excess Baby Fat
OCCUPATION – You may find this type working in a toy discount warehouse facility. Or maybe you’ll run across this type sweeping hair at the neighborhood barber shop, working part-time at a nursery or helping his parents out in the family owned hardware store.

FAVORITE FOODS – Dining with him will consist of a plate of warm baby cabbages, macaroni & cheese, and a Milky Way bar.
For lunch, you’ll share a peanut butter sandwich, two candy canes and a huge bowl of alphabet soup.
Dinner will be a Happy Meal from McDonalds, loaded with chicken nuggets and a chocolate chip cookie.
FAVORITE DRINKS – Wanna stay in and have drinks with this thumb sucking mama’s boy? If so, then be prepared to spend a cozy, romantic evening in front of the fireplace sipping Nestle Chocolate NesQuik.
Also, he’ll talk you into downing a couple of swigs of prune juice. According to his crazy philosophy, this will loosen ya’ll bowels thoroughly and help ease any anxiety progression towards a decent sexual performance.
….but first, he must call mom to get tips on the best positions!
FAVORITE MUSIC – ‘The Flintstones’ opening theme song will be high on his Top 10 chart. Also, you’ll be dancing to the beat from the ‘Three Stooges’ jingle and ‘The Simpsons’. (hey, those guys are his idols).
FAVORITE MOVIES/TV SHOWS – This childish joker will expect you to accompany him in viewing old video taped reruns of ‘Bozo’s Circus,’ and ‘the Disney Classics.’ Your fun-filled evening will also include MTV, and ‘Tom & Jerry’ cartoons.
FAVORITE SPORTS/HOBBIES – His hobby activities will include sand castle building, competitive dog & cat grooming and spit-shining old rusty wagon wheels. As far as the physical fitness portion is concerned, his legs receive plenty of exercise from jumping up and down when he doesn’t get his way.
TYPE OF CAR – He’ll really think he’s impressing you when he picks you up in a pint-size Yugo or ‘clown car,’ which will display his newly customized Donald and Daffy Duck interior.
(he’ll glow with pride when he tells you that it took every cent from his piggy bank to get the job done).
LAST BOOK- ‘Bedwetting Made Easy’ by Dr. Phil A. Bladder
TURN-ON’S – Tootsie Roll Pops with the bubble gum center, a well-oiled skateboard and a woman who enjoys 24-hour cartoon marathons.
TURN-OFF’S – Bossy women who are into competitive sports, a toy store going out of business, feminist groups and a chick that has a hand shake stronger than his.
SECRET FANTASY – To hold firm in his possession the largest collection of Harry Potter Magic and Mystery novels.
ASTROLOGICAL SIGN – Sagittarius

PERSONALITY – Still probably still camping out at home, this immature clown is half-way through a mind alteration process. Having strong family ties, he’s very sensitive to the suggestions and wishes of mom. He’ll always compare you and your cooking to dear ol’ mom.
IDEAL WOMAN – To be a mirror image of mom.
WHERE TO MEET – You can find this type usually at any Toys-R-Us, his mama’s favorite neighborhood supermarket, the corner candy store or the video arcade.
GOAL – To one day, meet and marry a woman just like good ol’ mom.
RATING – 2.4…..You probably think to yourself, you wish you had a way to study a character’s profile of this type before you started dating. Your relationship with this man could go either way.
But the long-term lecture from him constantly comparing you to his mother, could be bad for your mental health. A very stressful thing! Unfortunately, If you have a mental collapse, this could lead to drastic actions. Do you have any idea which actions I’m referring to?
Those actions that you know will eventually come; such as You going to the penitentiary and him?… to the graveyard!


Thanks for this info I really enjoyed it.
I have been experimenting in the kitchen quite a lot over the last 12 months and I have really taken to it.
It’s interesting here how a little creativity can turn simple ingredients into something amazing. I have also been dabbling with some keto recipes myself but I wanted to ask, do you have a favorite ingredient that you use in these recipes? And maybe a favorite recipe overall?
Looking forward to trying out some of your suggestions and learning more from you.
Thank you
Thank you Chris for checking in with me. My late wife and I both love to cook and try new recipes. The Chicken Salad Stuffed Avocados is my favorite dinner dish and the ‘Homemade Sweet Donuts’ is my special treat. I have no favorite ingredient preparations, for they all are good. And everything is laid out in easy to follow instruction.
Also at the beginning of my website is a banner which opens up to some great products, along with many ingredients, spices which could be used in your next meal. Check it out: https://rawspicebar.com/?sscid…